
Due to many false positives and the way speedtest.net is being used to test we hereby give you a better solution to test your network speed.
The speedtest.net application uses only one transfer thread with a single server. As we don’t know the actual network load or speed of the nearest speedtest.net server this is bad practice for testing 1G or 10G network performance.
We recommend the use of iperf3 to test the network speed of your server.
Linux (CentOS/AlmaLinux/Ubuntu)
First, we need to install iperf3 on your system.
Download iperf3
CentOS 7/8 & AlmaLinux:
yum install iperf3 epel-releaseUbuntu 18.04/20.04/22.04
apt-get install iperf3Run the test
You can run a simple iperf3 test by running the following command:
/usr/bin/iperf3 -c iperf.worldstream.nlWe do however suggest a slightly different test with some additional parameters to run over a longer time to get more accurate results:
/usr/bin/iperf3 -c iperf.worldstream.nl -P 8 -t 60 -i 0iperf3 runs an upload test by default, you are also able to test de download speed by adding the -R tag
/usr/bin/iperf3 -c iperf.worldstream.nl -P 8 -t 60 -i 0 -RVMWare ESXi
First, we need to access the VMware CLI, this can be done through Out-of-Band management or SSH.
For this example, we will use SSH.
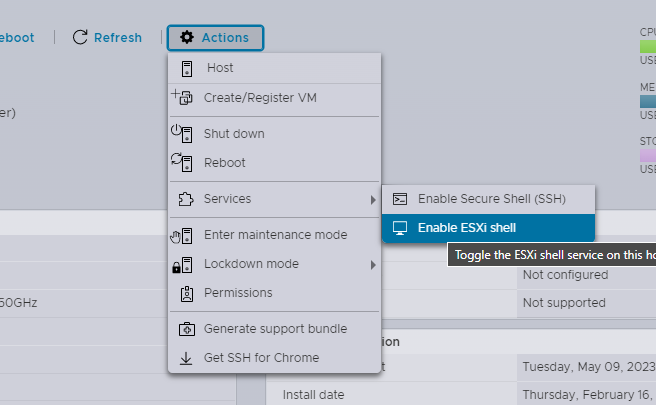
Log in to VMWare to your web panel and enable SSH access, you can find this at Host > Actions > Services > Enable Secure Shell (SSH)
After this is done, we can connect to the server through SSH. On Linux and Mac, this will be native within the terminal. for Windows, you will need a client like Putty. For this example, we will use putty on windows. Connect to the IP of the VMware host with ssh port 22.
After you have been connected we first need to disable the firewall
esxcli network firewall set --enabled falseYou can now run the upload test by running the following command:
/usr/lib/vmware/vsan/bin/iperf3 -c iperf.worldstream.nl -t 60 -P 8 -i 0 -4
For the download test use the following command:
/usr/lib/vmware/vsan/bin/iperf3 -c iperf.worldstream.nl -t 60 -P 8 -i 0 -4 -RWhen you are done, do not forget to re-enable the firewall again:
esxcli network firewall set --enabled trueAnd disable SSH access through the Web panel.
Windows
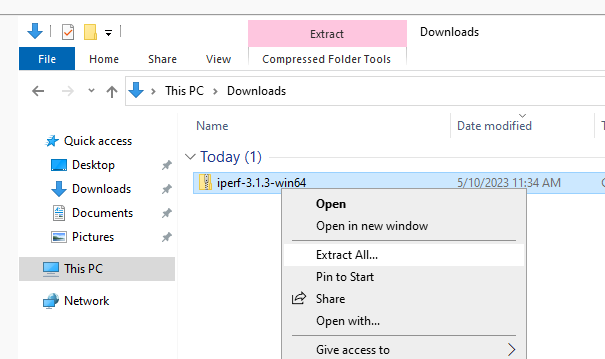
First download iPerf from their website: https://iperf.fr/iperf-download.php
After the ZIP archive has been downloaded, we will need to extract this.
Copy the files cygwin1.dll and iperf3 inside this folder to your C:\Windows\System32 folder.
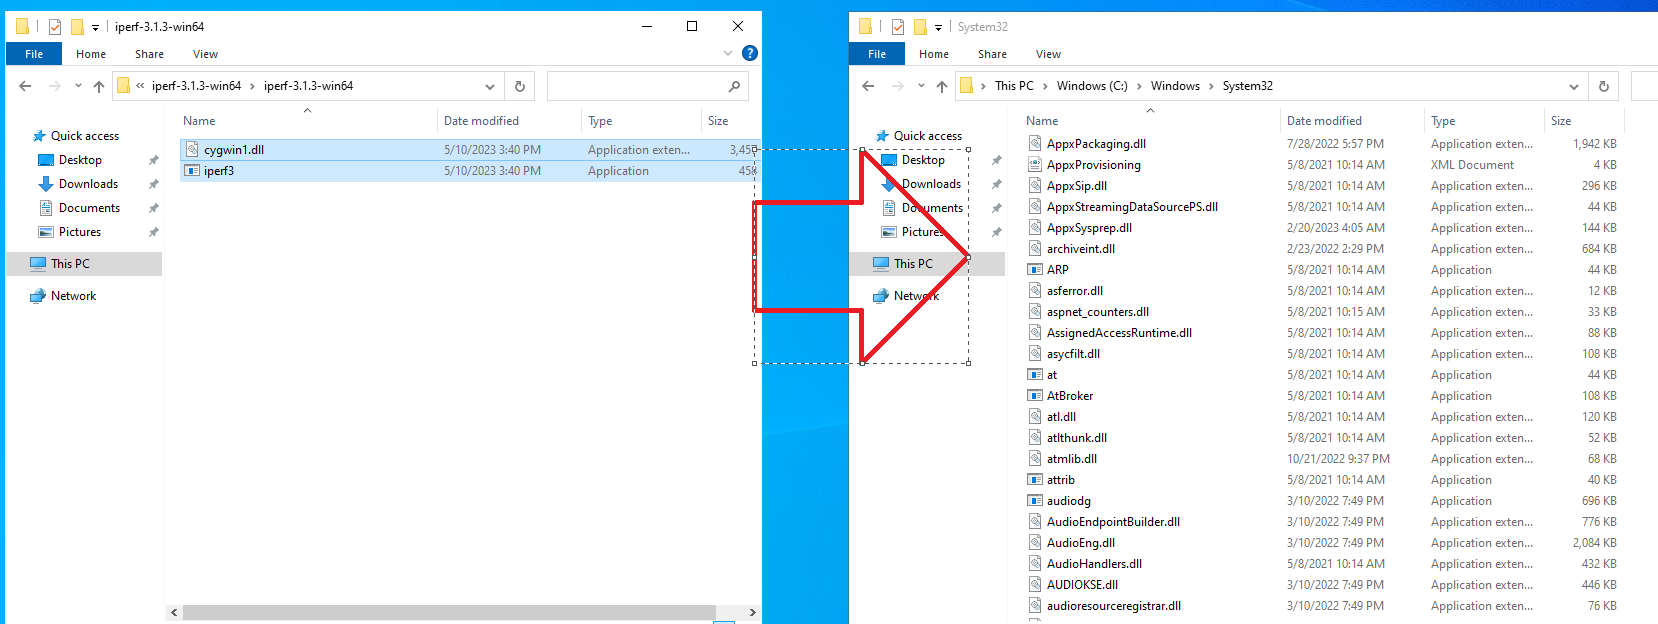
When this is done, iperf3 will be installed.
To run a test, open a cmd prompt (Windows key + R > cmd.exe) and run the following command:
iperf3 -c iperf.worldstream.nl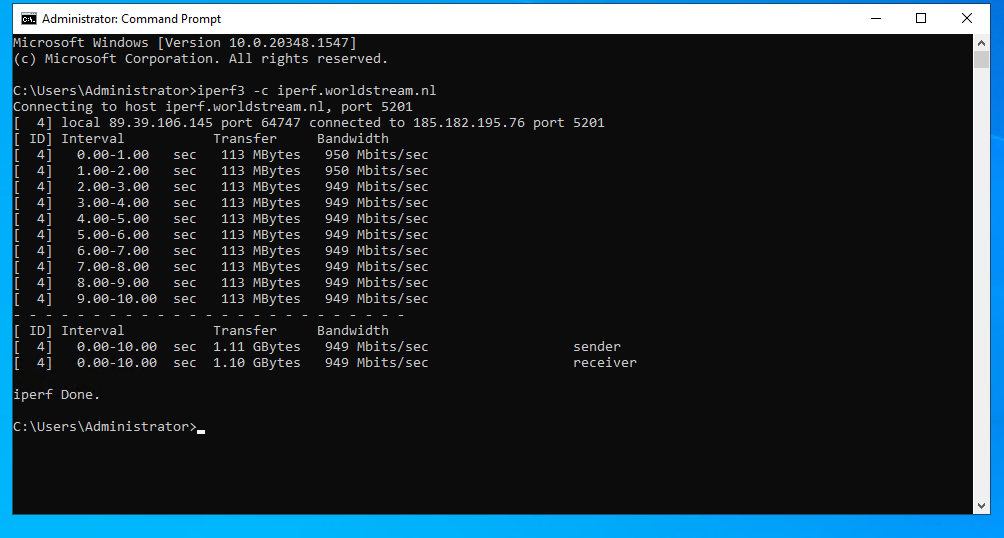
Optional
Here you can find a description of some of the useful parameters you can change.
| parameter | function |
| -p | Server port to listen/connect to |
| -P | Number of parallel client streams to run |
| -t | Time in seconds to transmit for (default 10 seconds) |
| -i | Interval: Seconds between periodic bandwidth reports |